Plan of approach
1. Introduction
In this chapter, the research topic is introduced along with the associated assignment. This aligns well with the FabLab, as explained in the organization description section.
1.1 Research topic
3D printers are highly accessible nowadays and have undergone significant development over the past decades. You don’t need to spend more than 200 euros to purchase a decent printer. This is fantastic for anyone who owns a printer because it encourages the sharing of more 3D files and the development of new printing techniques. One of the upcoming developments in this sector is multi-material printing. This offers advantages such as creating 3D prints that combine different materials, printing with various nozzle diameters (making infill, for example, print faster), water-soluble support printing, and multi-color prints.
For these reasons, there are already several solutions on the market. Each of these solutions has its pros and cons, but in many products, the disadvantages outweigh the advantages. Therefore, the plan is to design a product in which the benefits outweigh the drawbacks.
1.2 Assignment
“Develop a system that enables printing with multiple materials on existing printers.”
The assignment comes with the following conditions:
- Printing with 2 or more materials
- Applicable to 2 or more printers, which may vary in size
- Costs are less than €350
- Changing materials takes less than 30 seconds
- Feasible for anyone with a 3D printer
1.3 Organization description
On the website of FabLab BeNaLux, they describe the philosophy behind the organization as follows:
A FabLab is a public digital workshop where people are invited to create things themselves using various techniques, and where the open sharing of designs and ideas is encouraged. In other words, a FabLab is a workshop that provides easy access to a range of computer-controlled prototyping machines, allowing users to transform their ideas into tangible products.
A FabLab typically includes a laser cutter, a CNC milling machine, a 3D printer, a vinyl cutter, and an electronics corner. An important characteristic of Fablabs is that they share their knowledge with other Fablabs. They often serve as breeding grounds for innovations.” (FabLab BeNeLux, 2017)
2. Problem definition and main and sub-questions
There is currently no perfect solution for multi-material 3D printing; every product on the market has its drawbacks. In this chapter, the disadvantages/problem statements are described, from which the main and sub-questions are derived.
2.1 Problem Statement
To clarify the problem statement, an explanation of what is already available on the market will be provided. These products address multi-material printing in various ways. The advantages are omitted because every product ultimately boils down to the ability to print with multiple materials, placing more emphasis on the disadvantages.
2.1.1 MMU (multi-material unit)

It is an addition to single-extruder printers to enable printing with multiple materials. The unit facilitates filament exchange, allowing filaments to be retracted from the extruder and replaced with another during printing.
Disadvantages:
- Time and material wastage: Each material change takes more than 30 seconds, and material purging is required. This means that dozens of millimeters of material are pushed through the nozzle to clear the color and material. In slicers, they try to cleverly address this by using the purge tower as part of the actual print, but this is not ideal.
- Complexity: Building an MMU like the open-source ERCF (Enraged Rabbit Carrot Feeder) is highly complex, with the assembly manual spanning over 130 pages.
2.1.2 Filament splicing
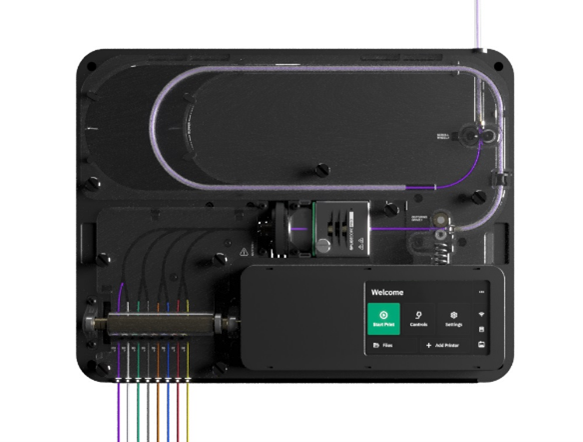
Filament splicing is a technique used in 3D printing to join two segments of filament together, creating an uninterrupted filament strand. This is employed to print with multiple filament colors or materials. The slicer indicates the right moment to combine the filaments to achieve the desired color effects or material transitions in your 3D prints.
Disadvantages:
- Calibration: You need to accurately set the length of the splicer to the printhead to ensure that the filament change occurs at the right moment.
- Purge tower: Filament splicing also requires the presence of a purge tower.
2.1.3 Dual hotend
Dual hotends are available in various configurations. Some models feature two print heads placed side by side Figure 4, while others use a system that switches between one hotend and the other Figure 3.
Disadvantages of the “Dual Switching Hotend” Figure 3:
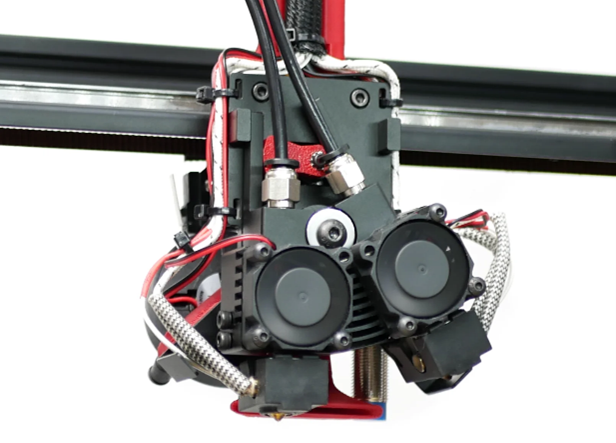
- Bowden extruder: A Bowden extruder is a component of a 3D printer where the extruder (the motor that feeds the filament) is located remotely from the print head and transports the filament to the print head through a tube. Bowden extruders are less suitable for flexible filaments, retract settings are critical, and long-distance accuracy is challenging due to filament pressure affecting tube bending.
Disadvantages of the “Dual Nozzle Hotend” Figure 4:
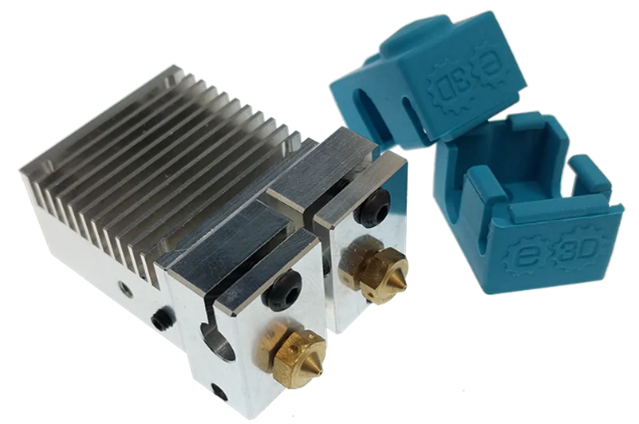
- Oozing: Oozing is the undesired leakage of molten filament from the print head when, in this case, the other print head is active. This leakage results in droplets or thin filament strands being deposited in places where they shouldn’t be or even pushing the print object off the bed.
2.1.4 IDEX (Independent Dual Extruder) 3D printing

IDEX is a type of 3D printer that features two independent print heads, and these print heads can move independently along the x-axis. One unique advantage that no other 3D printer offers is the ability to print two objects simultaneously.
Disadvantages:
- Reduces print surface area: Adding a print head to an existing 3D printer reduces the available print surface area on the print bed.
2.1.5 Toolchanger
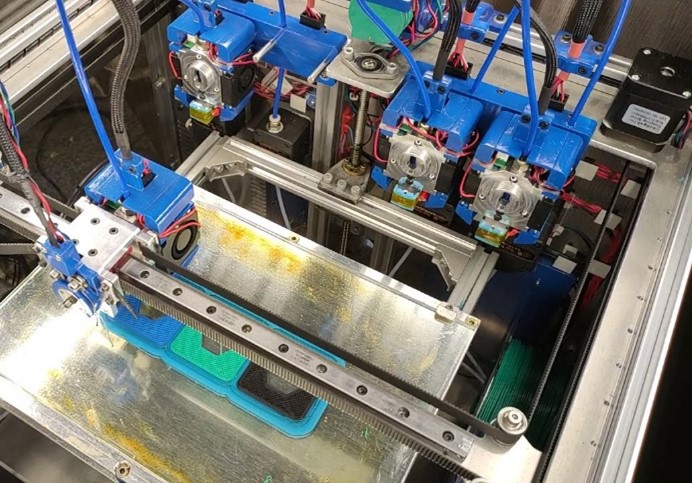
A toolchanger is a component or system used in advanced 3D printers to automatically switch between different tools, such as print heads, laser engravers, cutting plotters, and more, during the printing process. The primary purpose of a toolchanger is to enhance the versatility of a 3D printer by offering various functions without requiring the user to manually change tools.
Disadvantages:
- Cost: For each additional material you want to use in a print, you need an extra print head. The components you need to purchase additionally include an extruder, hotend, extruder cooling fan, part cooling fan, and print head. These costs can add up quickly.
- Complexity: A toolchanger requires complex software and firmware configurations to coordinate the correct tool choices and movements. This involves calibrating the pickup and drop-off locations of the print head, which can be a significant learning curve.
- Reliability: Maintaining reliability becomes increasingly challenging as the number of moving parts increases. Issues related to alignment, component wear, and calibration can arise, resulting in reduced reliability and unexpected downtime.
2.1.6 Cnc nozzle changing
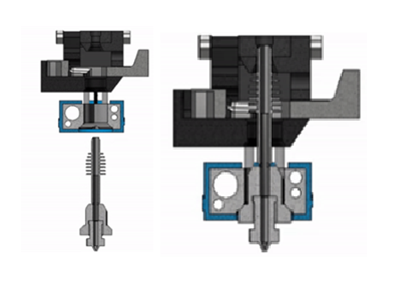
The Swapper3D by BigBrain3D is the only one on the market that performs a nozzle change similar to a CNC tool changer. They achieve this with many moving parts and their own extruder and nozzles. The nozzle enters from beneath the hotend and is secured with a pin at the top Figure 7. (The Swapper3DTM: No more purge blocks! – BigBrain3D, n.d.)
Disadvantages:

- Complexity: This design involves even more moving parts than what was mentioned with tool changing, making it quite complex.
- Proprietary: The hotend and nozzle are proprietary to BigBrain3D and not available as open source, and the cost of these products is considerably high.
2.2 Delimitation/Objective
The project is to create an open-source product that potentially innovates on existing products to enable multi-material printing on existing 3D printers. In this context, the existing platform is not or minimally modified, and the focus is on providing an addition.
For which 3D printers:
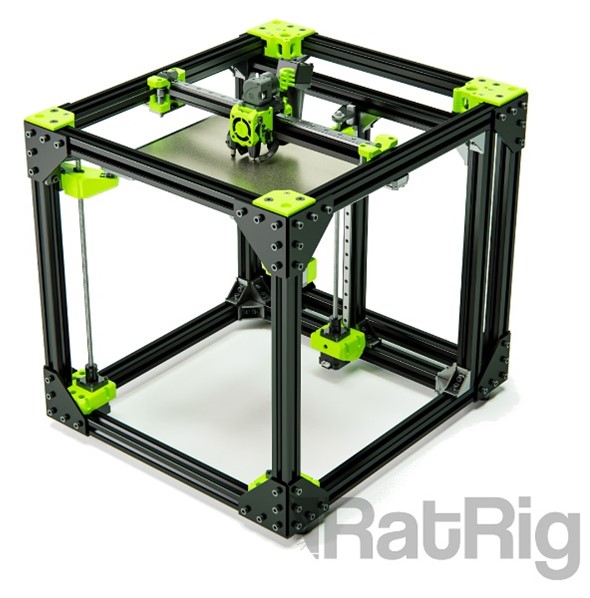
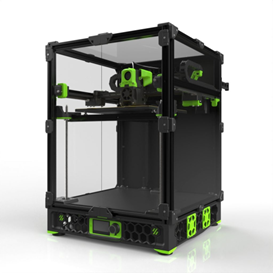
The fundamental open-source 3D print platforms for this purpose are the Ratrig V-core 3.1 Figure 9 and the open-source 3D print platforms Voron Trident or Voron 2 Figure 10.
Timeline:
Within 6 months.
Product delivery:
A physical product with publicly available documentation. This includes electronic connections and software and firmware configurations.
2.3 Main quesetion
What is the best add-on for existing 3D printers that enables multi-material printing?
2.4 Sub-question
To answer the main question, the following sub-questions have been formulated:
-
What specific multi-material 3D printing products exist? Under the problem statement, all overarching methods have been discussed. Within these overarching methods, there are also specific products that can be examined.
-
What tool-changing methods exist in other production machines? 3D printers are not the first machines where tool changes are needed during production. Perhaps there are lessons to be learned from other manufacturing machines.
-
Which purchaseable components offer possibilities within the budget? There are many different types of extruders, hotends, and nozzles on the market today. Development in the field of 3D printers is very active. Are there purchasable components that can create new possibilities, improve options, or make methods more cost-effective?
-
What possibilities exist between the slicer and G-code? The slicer generates the G-code. What are the possibilities for including additional information in the G-code, and how can it be ensured that the 3D printer’s computer can read and execute this information?
-
What methods can change materials within 30 seconds? Create a table outlining which products can switch materials within 30 seconds and without wasting plastic.
To obtain answers to these sub-questions, research will be conducted, as described in the product delivery section. It is also possible that new and additional questions may arise during the design process, and these will be addressed in part 1 of the project.
3. Activities and Deliverables
In this chapter, we will describe the activities and deliverables that will be provided to answer the main research question.
3.1 Sub-product 1: Research and Project Requirements
In this sub-product, the following activities and deliverables will be included:
3.1.1 Activities
In sub-product 1, an analysis will be conducted to address the research questions outlined in Chapter 2, with a general approach already indicated.
The activities to be performed include:
- Using search engines and YouTube videos to research the topics mentioned in the research questions in Chapter 2.
- Consulting various Discord channels.
- Documenting the project requirements based on the research questions and the established constraints.
3.1.2 Deliverables
The deliverable for the research phase is a research report in which the research questions will be systematically answered one by one with substantiated explanations. Proper referencing of sources will be done using the APA method.
3.2 Sub-product 2: Solutions for Sub-Functions
In this sub-product, the following activities and deliverables will be included:
3.2.1 Activities
A functional analysis will be conducted, followed by a brainstorming session. From this brainstorming session, potential solutions for the defined functions will emerge. These solutions will be represented as small sketches in a morphological overview. For each of the functions, at least 3 solutions will be sketched.
- Functional analysis
- Brainstorming session
- Morphological overview
- Any necessary experiments
- Any necessary calculations
3.2.2 Deliverables
The deliverable is a report that presents the activities conducted. The morphological overview will be presented in A3 format, and the ideas will be substantiated.
3.3 Sub-product 3: Concept Designs
In this sub-product, the following activities and deliverables will be included:
3.3.1 Activities
Based on the morphological overview, concept designs will be generated. Lines will be drawn for each concept, connecting potentially complementary solutions. The number of concepts will depend on the possibilities presented in the morphological overview. The concepts will be presented as drawings and descriptions of the entire product, including the functionality, form, and operational principles of the product.
3.3.2 Deliverables
The concepts will be delivered as follows:
- For each concept, a 3D drawing with multiple 2D views.
- An explanation of the operational principle.
- Identification of the strengths and weaknesses of each concept.
- Key dimensions will be specified.
- Mechanical functions will be clearly indicated.
These concept designs will serve as the foundation for further development and evaluation, providing a range of potential directions to explore.
3.4 Sub-product 4: Detailing of the Chosen Concept
In this sub-product, the following activities and deliverables will be included:
3.4.1 Activities
A selection matrix will be created, consisting of success criteria to which weighting factors are assigned, and these factors will be substantiated. This matrix will be used to evaluate the concepts and provide them with a meaningful ranking.
Following that, the chosen concept design will be detailed extensively. All aspects of the final design will be specified, including assembly drawings, exploded views, and component drawings in Inventor or Fusion 360. Additionally, a numbered parts list with references to the drawings will be provided. For purchased components, all specifications will be documented to facilitate procurement.
This is also the stage to consider the control system of the concept. It involves referencing how others manage the control of similar products and exploring programming languages that might be used for controlling the concept effectively.
3.4.2 Deliverables
The deliverable for sub-product 4 is a report that consolidates the following components:
- Drawings: assembly drawings, exploded views, and individual part drawings.
- Bill of Materials (BOM).
- All specifications for purchased components.
- Material selection for fabricated parts.
- xDraft code for controlling the concept.
These detailed documents will provide a comprehensive understanding of the chosen concept design and enable its practical realization.
3.5 Sub-product 5: Construction and Testing of the Prototype and Evaluation
In this sub-product, the following activities and deliverables will be included:
3.5.1 Activities
Build a prototype based on the detailed design, with the goal of demonstrating the functions outlined in the detailed design.
Connect the prototype to the printer to enable control of the prototype.
Then, the challenge is to program the slicer and 3D printer to make the prototype perform its intended functions. Depending on this process, it may be necessary to modify the concept to make the functions achievable. To draw meaningful conclusions from the tests, test procedures will be defined in advance, covering the research question, hypothesis, test setup, test procedure, results, and conclusion.
Once the test procedures are completed, an evaluation will take place. This evaluation will assess the extent to which the final result meets the requirements and success criteria from the Project Requirements and identify areas for further innovation. It will also revisit the research questions, considering whether new questions have emerged due to evolving insights or whether existing questions need further investigation. Based on the evaluation, the concept will be improved or potentially canceled to explore alternative directions.
3.5.2 Deliverables
The deliverable for sub-product 5 is a report that consolidates the following components:
- Physical prototype.
- Report with photos documenting the construction process of the prototype.
- Test procedures and test results.
- Demonstrative videos of the performed tests.
- Documentation of the evaluation and its outcomes.
- Open-source contributions to the Project.
These deliverables will showcase the real-world implementation and testing of the chosen concept, providing insights into its feasibility and performance.